Welcome

Welcome! I'm so glad you stopped by today! If you're inspired by what you see, I invite you to follow along via one (or more) of the options on the side bar below.


Showing posts with label baby. Show all posts

Thursday, October 20, 2011

Inspired by... details


Many of you know I enjoy digital scrapbooking. I've shared many of my layouts, along with template freebies and computer desktop designs here on this blog. I enjoy the abundance of creative elements and papers available for the digi scrapper, as well as the ability to manipulate the pictures, improve picture quality, etc. But one of the best things about digital scrapbooking is the cost. It's extremely affordable compared to traditional scrapbooking. That was a big reason for me to make the switch.

Actually, I still do some traditional scrapbooking. In fact, I'm currently working on a two-album project for a friend. She had already purchased themed books, papers, stickers, etc. which was great, because my traditional scrapbooking stash is so lacking. We agreed I would do traditional scrapbooking pages until all her supplies were exhausted and then we'll switch to digital!


What I want to share with you today are some tips on how to save money when doing traditional scrapbooking layouts.


The two albums I'm working on for her are baby albums. One thing my friend did, that I would encourage you to do too is that she saved (nearly!) everything! Baby shower cards, bags, ribbons off the gift wrap, etc. Not only will these "elements" save you money when designing your pages, but they will also give the pages more meaning because they'll be made with things your received from friends and relatives. Here are a couple of examples:

I loved this gift bag she saved. The little duck fit the theme from one of her baby showers perfectly.


Duck_Bag


The rope was one of the handles off the gift bag. I took the bag apart, cut out the ducks, removed the blue "water" and then used the holes as a pattern to cut from on the actual page layout.


Duck_Water


There was only one 3D duck on the bag, but I cut out the others and (making them 3D) used them along the top of the page.


Duck_Corner


The tag on the bag was this cute bottle of bubbles:


Bubbles


Here's a shot of the finished page, so you can see how the individual elements came together.


Whole_Page_Duck


So many of the gift bags now days have 3 dimensional elements. As you can see, these are great to save and use on your scrapbook layouts.


Giraffe


Here's an adorable giraffe off another gift bag. I'm saving his other two "friends" for another page!

Greeting cards are another great resource for traditional scrapbooking elements.


Stork


I cut this little guy off one of the baby shower cards my friend received. I saved the handwritten part of the card and slipped it behind the page in the scrapbook. This was the perfect element for the "First Moments" page in my friends album.

These examples were for baby, but you can apply this practice to almost anything. Weddings, birthdays, graduation, etc. Really any meaningful cards, wrappings, etc. can be incorporated.

I hope these scrapbooking tips have inspired you!


Do you scrap? Digital? Traditional? Both?

I'd love for you to share some of your own tips and tricks in the comments!


Blessings,

Blog_Signature

PS If you're one of those people that bought all the stuff, saved all the pictures, but never got it done – shoot me an email, I'd love to help!


Sharing inspiration here:

Stuff and Nonsense The Shabby Nest

Friday, August 19, 2011

Inspired by... baby


I've got some inspiration by way of scrapbook layouts (LO's) for you today.  When I first joined the Creative Teams (CT's) for Dancing Princess Designs and Designs by Krista, I was a little concerned about having appropriate photos to scrap.  After all, the majority of scrappers out there have families and are doing LO's (mostly) of their kids. On the other hand, I have quite a few a lifetime of memories saved on my computer and could probably find something to work with pretty much any kit out there! I was rockin' along pretty well until...

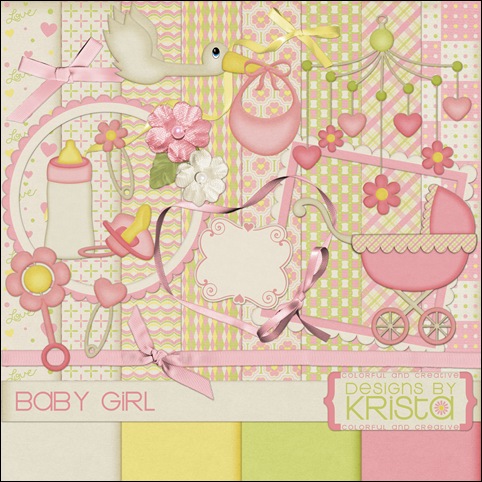
Krista asked me to work with her Baby Girl kit.

bbygirl_preview

Umm, baby? baby? anybody got a baby? Anybody had a baby?

We have several new babies in our church family and I knew my friends would probably let me do a LO using their pictures, but I really didn't have time to gain the necessary permission (my LO's are published in online galleries) and photos.  So, while I knew the photos wouldn't be the best quality, I decided to do a LO with some old family photos.

WJM_First_Year

This kit is really fun! And as you can see, there are many elements in the kit that didn't even make it into my LO. Working with the older pictures has got me thinking about working with some (much older) family pictures that my dad has collected over the years. Krista has some beautiful "old paper" kits which would work fabulously for this!

Here's a LO I did for last week's Trixie Scraps challenge, to use cardstock papers:

WildSeed_Farms

I also picked up two new kits this week:

preview

ts_masterchef_ep


Aromatic Herbs by et Designs and Master Chef by Trixie Scraps.  I'll be using these for some fun hybrid ideas I have in mind and will be sharing those with you soon! (the images are linked if you want to check them out in more detail)

I'm working on several projects that I'll be sharing with you soon.  And I finished a project today that I'll be sharing with you tomorrow and I can't wait for you to see what I made!!!


Are you working on any projects you're excited about sharing?

I'd love to hear!


Blessings,

Blog_Signature

Tuesday, August 9, 2011

Inspired by... the little things


We had a birth at our house this week!

Actually, two births!


Its_the_Little_Things

Last month I shared with you about the swallows on our back porch. 

The first round of babies were fledging and there was a lot of excitement around here!

(I also shared a recipe for No Melt Suet.  Which may come in handy, since nearly everyone is melting this summer.)

Well, this week, the excitement is all about the

two new baby Barn Swallows

that just hatched!  That's one of the eggs pictured above.

I haven't seen them yet, they're only about 3 days old, but I've heard them callin' their momma!

So sweet!

When Kim Klassen announced her theme for this week, "It's the little things," I just knew I had to share about the new babies!

I absolutely love Kim's texture, Waterstained Frame!


Here's the recipe for the image above:

Swallow_Egg_Recipe2

I just love what the texture did for the background photo, which is actually the top of a box I purchased at a craft store.

I love boxes and baskets 'cause they hide my junk help organize my stuff! and look so pretty doing it!

What's your favorite way to hide organize your junk stuff?


Blessings,


Blog_Signature

Sharing inspiration here:


kimklassencafe and then, she {snapped}

Thursday, July 7, 2011

Inspired by... pink

Confession time. 
I was at the craft store the other week and the first thing that caught my eye even before I had entered the store was this little plastic tote.


Here's the confession part: I bought it just because it was pink!  The fact that I thought it was priced at $2 also might have had something to do with it.  It wasn't, two dollars that is. It was $5.  Of course I didn't catch that until I was half way home.  I really hate dislike having to return things...

SO... I decided to dress her up instead!

First... I cut some small slits about 2" apart all the way around the top of the tote, using my grid cutting board as a guide. (Don't worry about being exact)


Next... I cut some ribbon in (approx) 6" lengths.  My ribbon was 3/4" wide, but experimenting with different ribbon thicknesses will just add to the fun!  I attached a safety pin to one end to pull it through the cut in the plastic.  Hint: as soon as the ribbon is through, remove the pin and use your fingers to tug the rest of the ribbon through.  Pulling too much with the pin will damage your ribbon.
Tie your ribbon.  Cut the ends at an angle (if you wish) and burn the ends to prevent fraying.

I also added some bling...
... on the sides of the tote.  Just for fun!

Here's how she turned out.

What do you think?

This would be a great tote for the beach/pool because it's plastic.
 

Here are some other ideas:

  • Magazines
  • Books
  • Toilet Tissue
  • Baby Shower gift "wrap" (diapers, burp cloths, etc.)
  • Birthday gift "wrap"
  • BBQ/picnic accessories (plates, napkins, utensils, etc.)
  • File Folder/Scrapbook paper storage
  • Storage container for little girls (or big girls!) room

I'd love to hear what other great usage ideas
you can come up with!

And check back next week for more inspirations in pink!

Blessings,

Linking with:

Tidy Mom   Somewhat Simple   Join  us Saturdays at tatertotsandjello.com for the weekend wrap 
 up           party!